Wood is an antique material used for building closed structures, artifacts, and various types of architecture. Unlike plastic, it needs to be maintained on a periodic basis, especially from termites, moisture, and dryness. Renovating wood is an intricate task; experts tend to follow a time-oriented procedure with proper safety and guidelines. If your wooden furniture is getting scrapped, contact Flooring and Refinishing Guru today!
Wood staining elongates the useful life of the wooden architecture. Besides, it helps to reduce huge spendings and enhance the aesthetic appeal of closed structures. Other benefits include:
- The wood’s grain, color, and texture remains visible
- Penetrates the grains and develops a clear sheen
- Maintaining the resale value of the fixture
Wood Staining – The Living Art
Staining wood is a timeless craft that augments the attractive appeal. It is beneficial for indoor and outdoor furniture. This method gives color and luster to the surface and protects it from environmental elements, such as rain and dust.
Following is a step-wise process of staining wood.
Materials Needed
Before you commence the staining process, it’s crucial to amass all the materials and tools. Below is a list of the commodities.
Wood
Choose the type of wood that fits your project. Popular choices include oak, cedar, pine, and maple.
Stain
Pick a stain color that complements your design. You can select from a range of stain shades.
Pre-Stain Wood Conditioner
Pre-Stain Wood Conditioner helps to absorb the stain evenly, especially on softwoods.
Sanding Supplies
Sandpaper (various grits), sanding block, or an orbital sander.
Tack Cloth
To wipe down the wood between sanding and staining.
Brushes
Foam brushes, bristle brushes, or a staining pad.
Stir Stick
Stir Stick is used to mix the stain.
Protective Gear
- Safety goggles, dust mask, and gloves.
- Tools
- Screwdriver
- Drop Cloth
- Painter’s Tape
- Clean Containers
- Brush Cleaner or Mineral Spirits
- Well-Ventilated Workspace
Read More
Best Natural Ways Used to Care for Wooden Floors
How to Take Proper Care for Wood Flooring?
Best Tips to Use Hand Scrapper for Hardwood Floors
Preparing Wood
Remove Hardware
If you’re staining furniture, remove any hardware such as handles, hinges, or knobs.
Sand the Wood
Start with a coarse-grit sandpaper (around 80-120 grit) to remove any rough spots, imperfections, or old finish. Gradually work your way up to finer grits (220-320) for a smoother surface. Sand in the direction of the wood grain.
Clean the Wood
After sanding, use a clean cloth or tack cloth to wipe away all dust and debris. Ensure the surface is completely clean; even a small speck of dust can affect the final finish.
Apply Pre-Stain Wood Conditioner
If you’re working with softwoods like pine or fir, applying a pre-stain wood conditioner can help the stain absorb more evenly. Follow the product’s instructions for application and drying time.
Staining the Wood
Mix the Stain
Before opening the can, gently stir the stain using a stir stick to ensure it’s well mixed. Be cautious not to introduce air bubbles.
Test on a Scrap Piece
It’s a good practice to test the stain on a scrap piece of the same wood to see how it will look. Adjust the number of coats to achieve the desired color.
Read More
Questions to Ask Wood Floor Refinishing Services Before Hire
How to Repair Hardwood Flooring from Water Damage?
How to Find the Best Wooden Floor Repair Companies in Southern California?
Apply the Stain
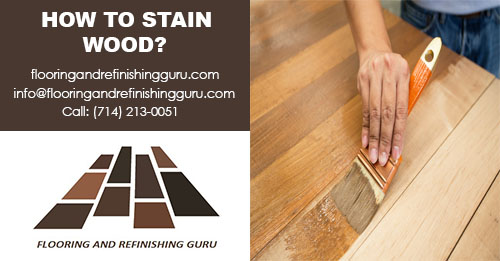
Use a brush, foam brush, or staining pad to apply the stain in the direction of the wood grain: Apply evenly and consistently. Avoid leaving puddles or heavy streaks.
Wipe Off Excess Stain
After applying the stain, wait for a few minutes (typically 5-15 minutes) to allow the stain to penetrate the wood. Then, using a clean cloth, wipe off any excess stain. This step helps control color depth.
Dry and Repeat
Allow the first coat to dry according to the manufacturer’s instructions. If you desire a darker color, repeat the staining process with additional coats until you achieve the desired shade.
Finishing Touches
Apply a Topcoat
To add durability and a glossy finish, you can apply a clear topcoat like polyurethane or varnish. Make sure the stain is completely dry before applying the topcoat. Follow the product instructions for application and drying times.
Reassemble Hardware
Once everything is dry, reattach any hardware you removed from your furniture or project.
Cleanup
Clean your brushes and tools with brush cleaner or mineral spirits. Dispose of any used rags or materials safely to prevent spontaneous combustion. If you want your fixtures to stay long-lasting and attractive, contact Flooring and Refinishing Guru, the best company in the USA.


